Context
Context refers to the surrounding information that Refact.ai uses to provide a better quality of generated code. This can include:
- Code Syntax: By analyzing the current state of the code, Refact.ai can provide syntactically correct code completions.
- Developer’s Intent: Interpreting comments, variable names, and function signatures, Refact.ai can provide code suggestions that are more relevant to the developer’s intent.
- Repo-level awareness: By analyzing the repository’s codebase, Refact.ai can provide code suggestions that are more relevant to the existing codebase.
RAG
Refact.ai uses RAG (Retrieval-Augmented Generation) to fill the context with the information that is needed to provide a better quality of generated code.
Enabling RAG
In order to enable RAG, you need to follow the instructions depending on the version of the Refact.ai you are using.
Cloud Version
- In the settings of the plugin (can be accessed by pressing the cogwheel icon in the sidebar), under the
Refactai: Code Completion Modelsection, specify thestarcoder2/3bmodel.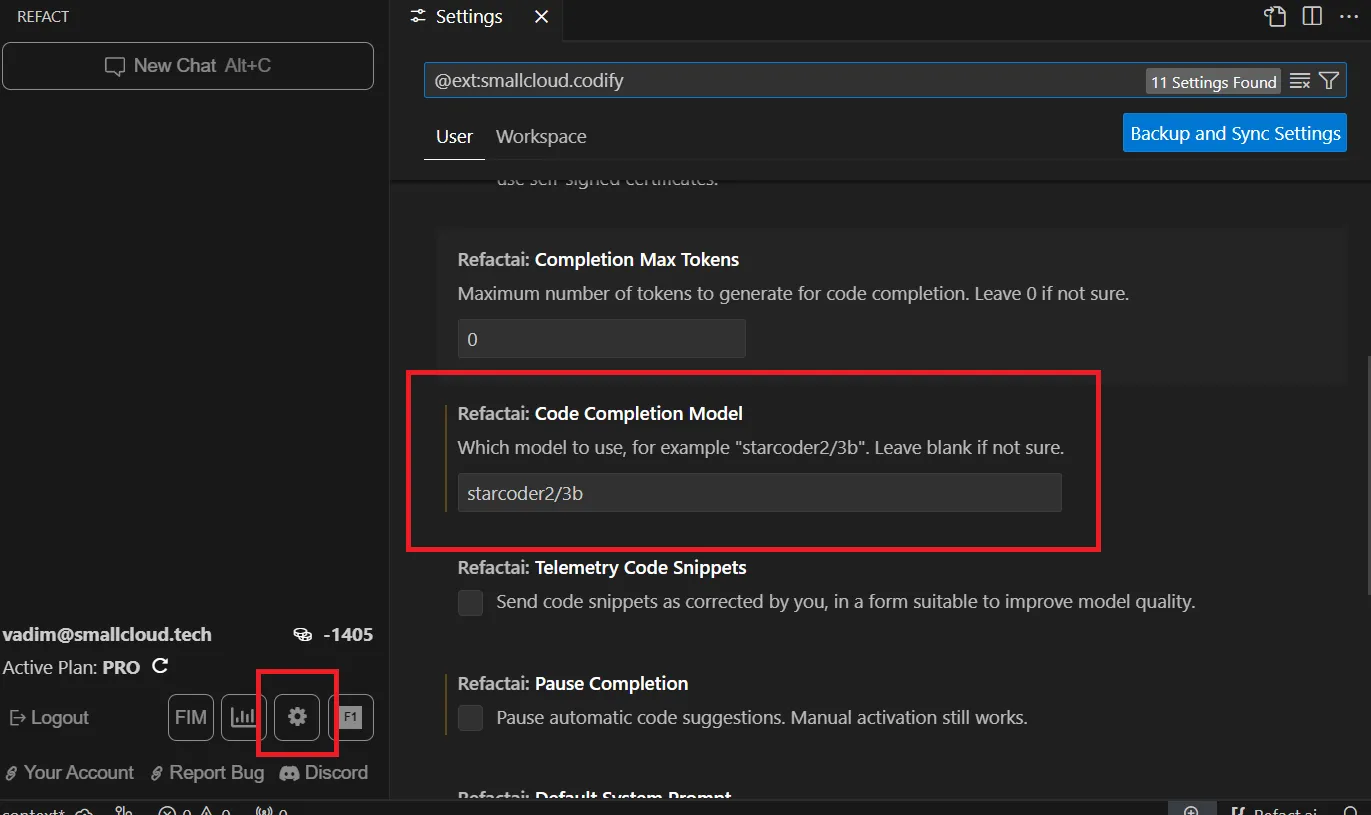
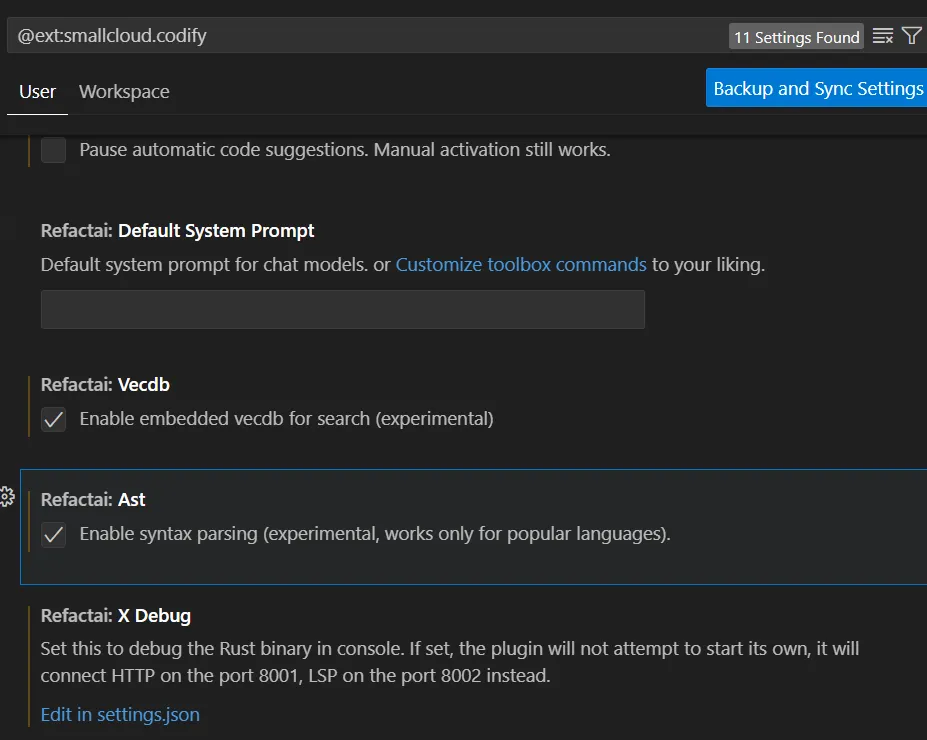
- To enable RAG for code completion, you need to enable the
Enable syntax parsingcheckbox under theRefactai: Astsection. - To enable RAG for the AI chat, you need to enable the
Enable embedded vecdb for searchcheckbox under theRefactai: Vecdbsection. Read more in the AI Chat Documentation about available features.
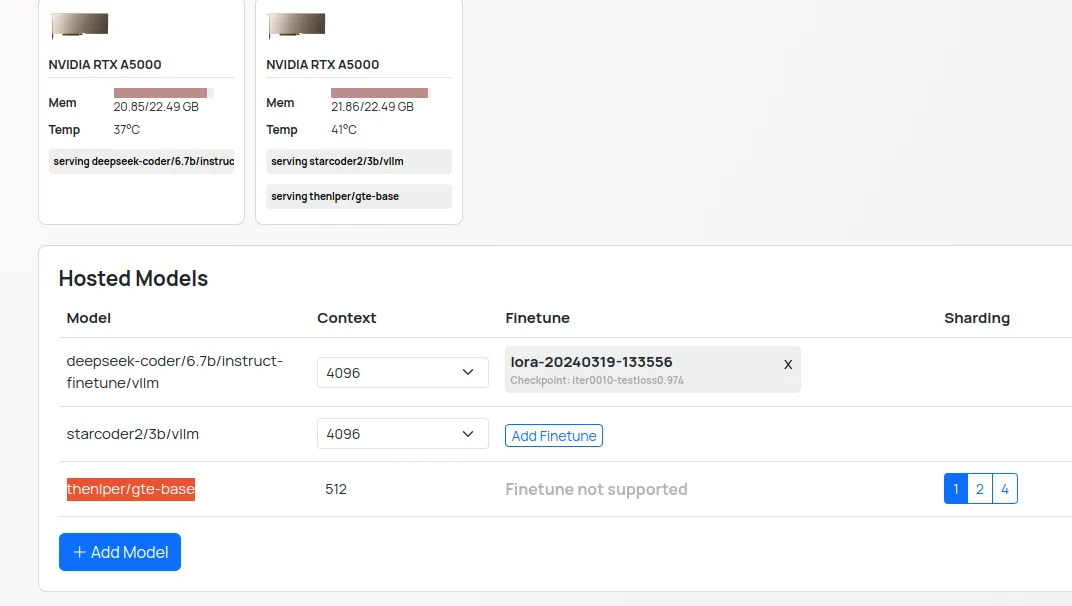
Refact Enterprise
- In the Web UI of your Refact.ai instance, navigate to the
Model Hostingpage. press theAdd Modelbutton to switch the model, locate and select one of thestarcoder2/models.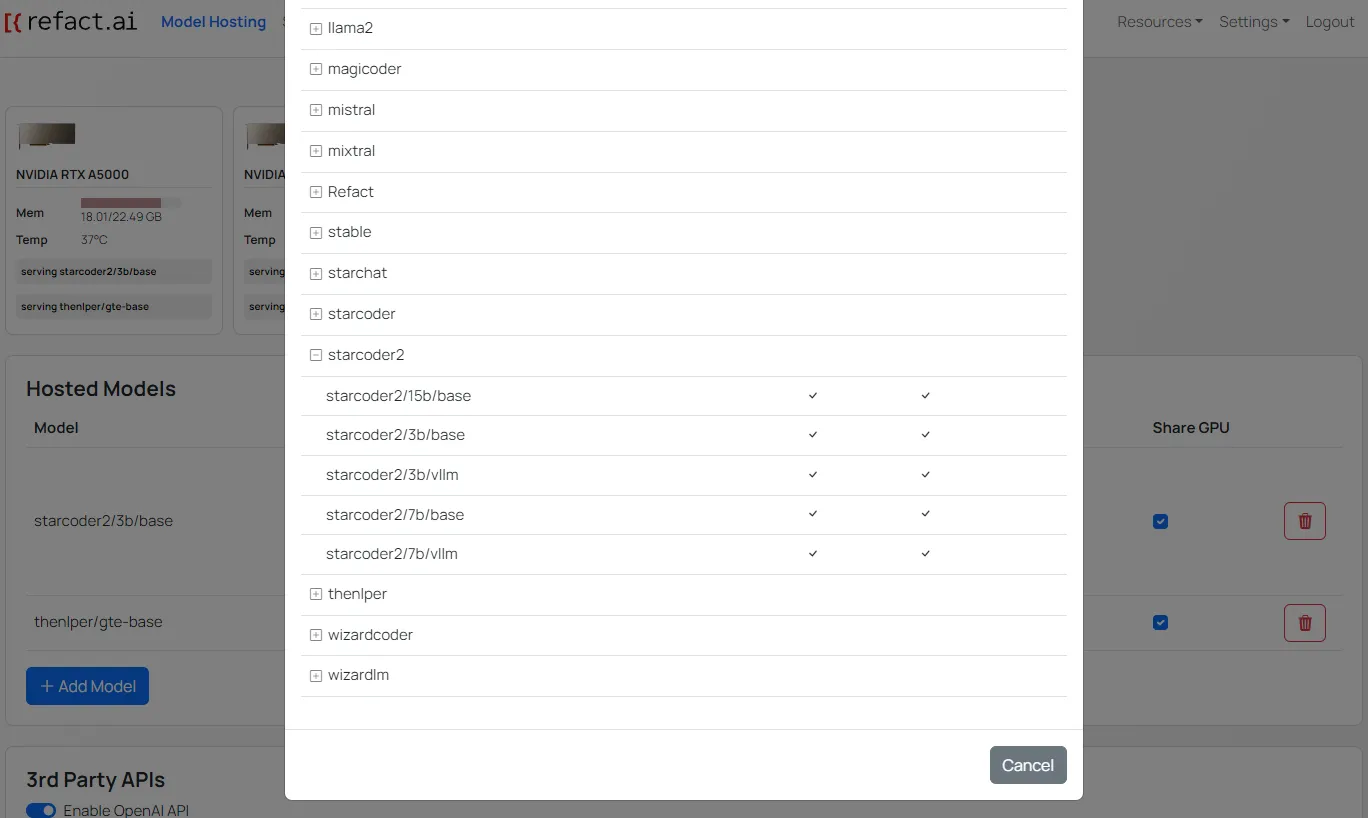
- To enable RAG for code completion, you need to enable the
Enable syntax parsingcheckbox under theRefactai: Astsection. - To enable RAG for the AI chat, you need to enable the
Enable embedded vecdb for searchcheckbox under theRefactai: Vecdbsection. Read more in the AI Chat Documentation about available features. - If Vecdb checkbox is enabled in your VS Code settings, you need to select the
thenlper/gte-basemodel in your Refact.ai instance. In the Web UI of your Refact.ai instance, navigate to theModel Hostingpage. Press theAdd Modelbutton, locate and select thethenlper/gte-basemodel.