Fine-tuning
Fine-tuning is a process of pretraining a base model to improve the quality of generated code.
Fine-tuning is supported in the following version of Refact.ai:
Use-cases
Fine-tuning can be particularly useful for:
- Adapting the model to a specific programming language.
- Customizing the model for a particular technology stack.
- Aligning the model outputs with a predefined style guide.
Creating a Fine-Tuned Model
Create a Project
- Navigate to the
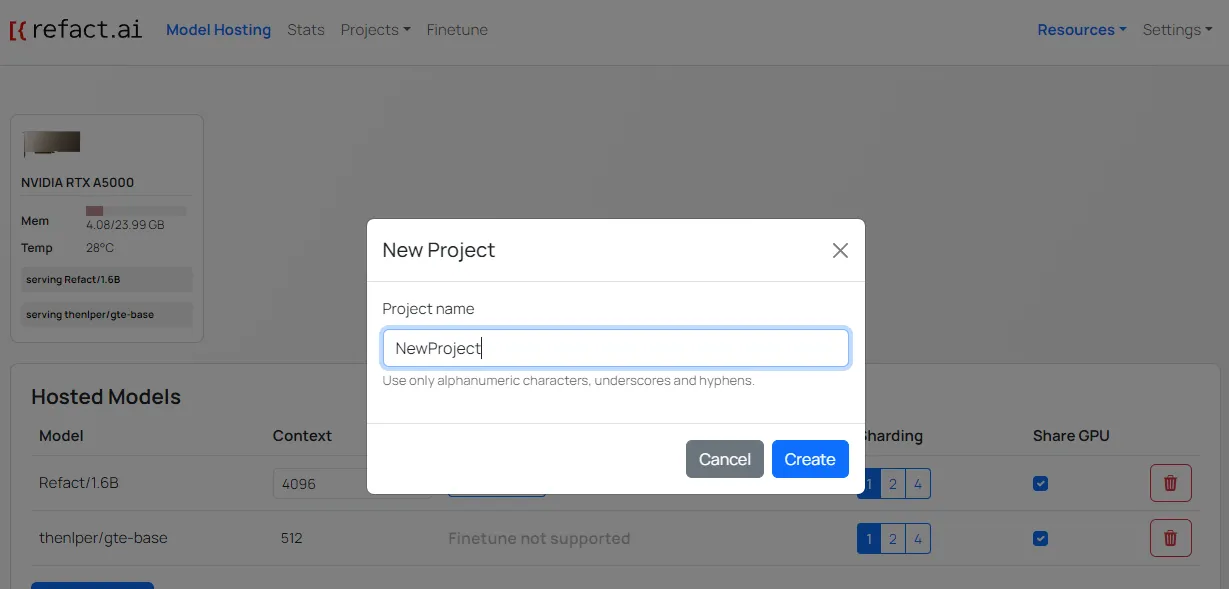
Projectsdropdown. - Click the
New Projectbutton or choose an existing project if applicable. - In the pop-up window, enter the project name and click
Create.
Add Fine-Tuning Data
You can add data for fine-tuning through the following methods:
- Add Git Repository:
- For public repositories, use an HTTPS link:
https://github.com/my_company/my_repo. - For private repositories, ensure an SSH Key is added, then use an SSH link:
git@github.com:my_company/my_repo.git. - Optionally, specify the branch to pull data from.
- For public repositories, use an HTTPS link:
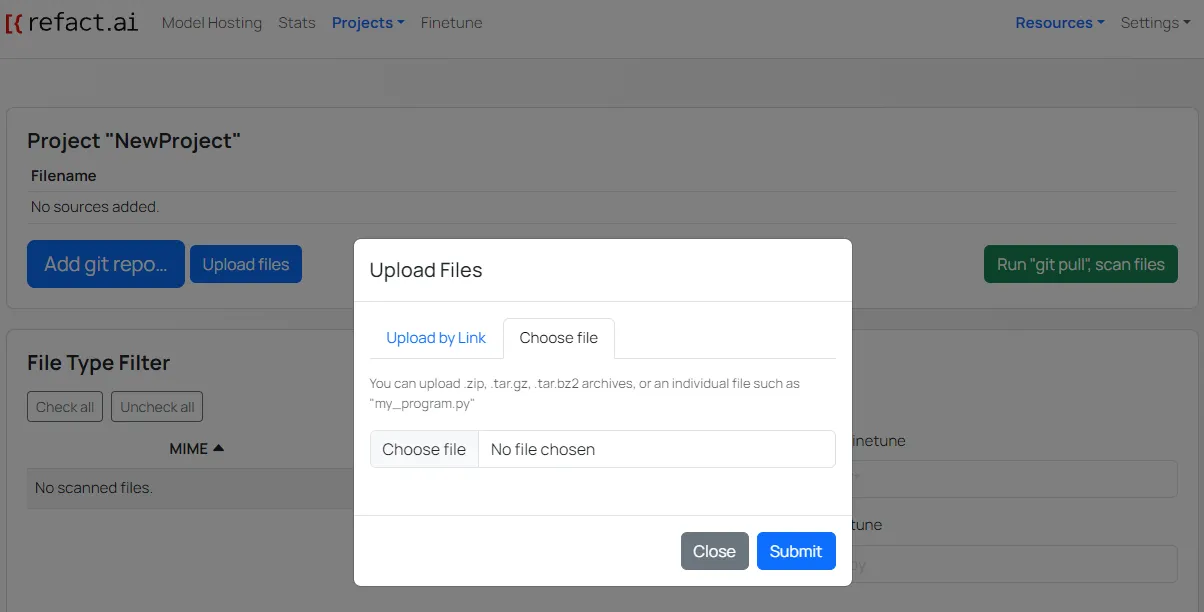
- Upload Files:
- By Link: Enter the URL of the file (e.g.,
https://yourserver.com/file.zip). Make sure to use a direct URL. - From Local Storage: Click
Choose fileand select the file to upload from your local device.
- By Link: Enter the URL of the file (e.g.,
Scan and Filter Files
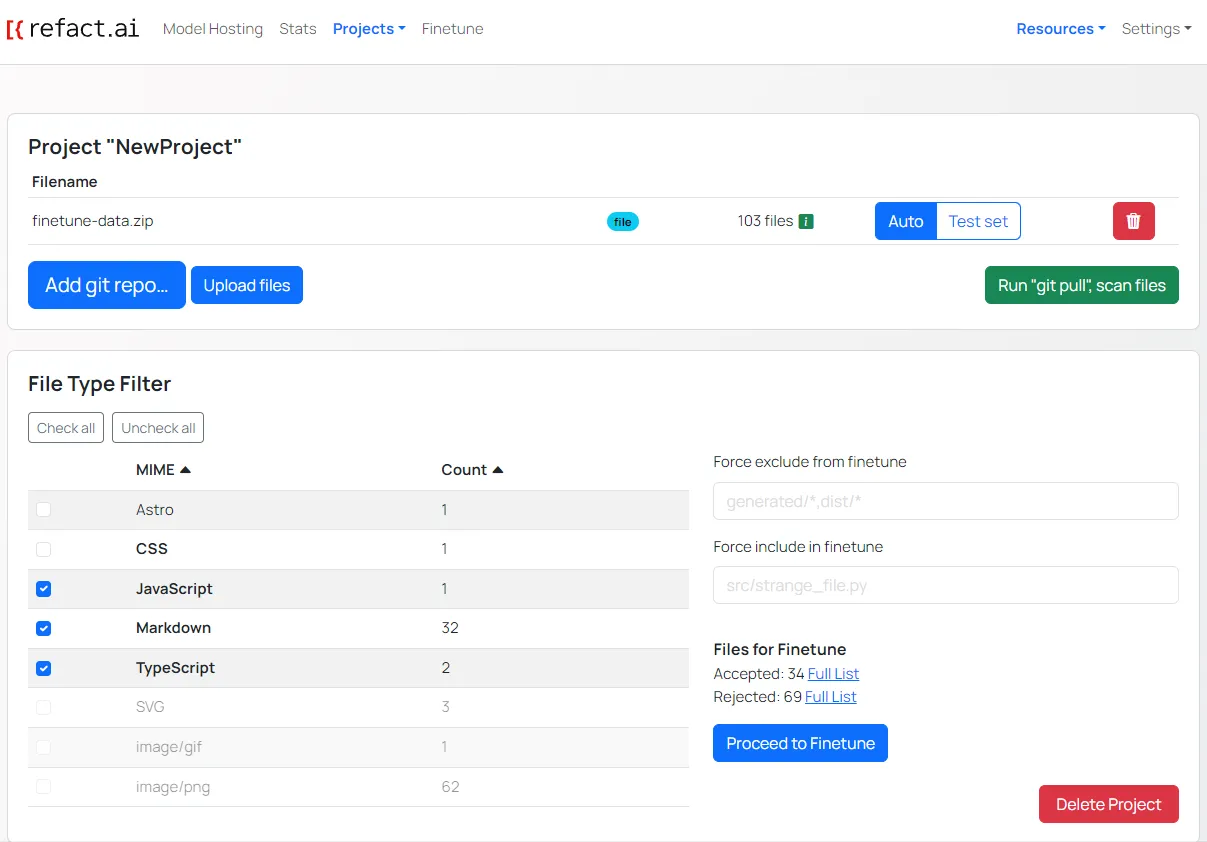
- Click
Run 'git pull', scan files. - After scanning, the file types and counts are displayed in the File Type Filter section.
- Select the file types you want to fine-tune with checkboxes. Details on accepted and rejected files are available by clicking the Full List button.
Start Fine-Tuning
- Click
Proceed to Fine-tuningor navigate to the Finetune page. - In the Start New Finetune page, select the project created during the previous steps.
- Select the model you want to fine-tune from the Select Model dropdown.
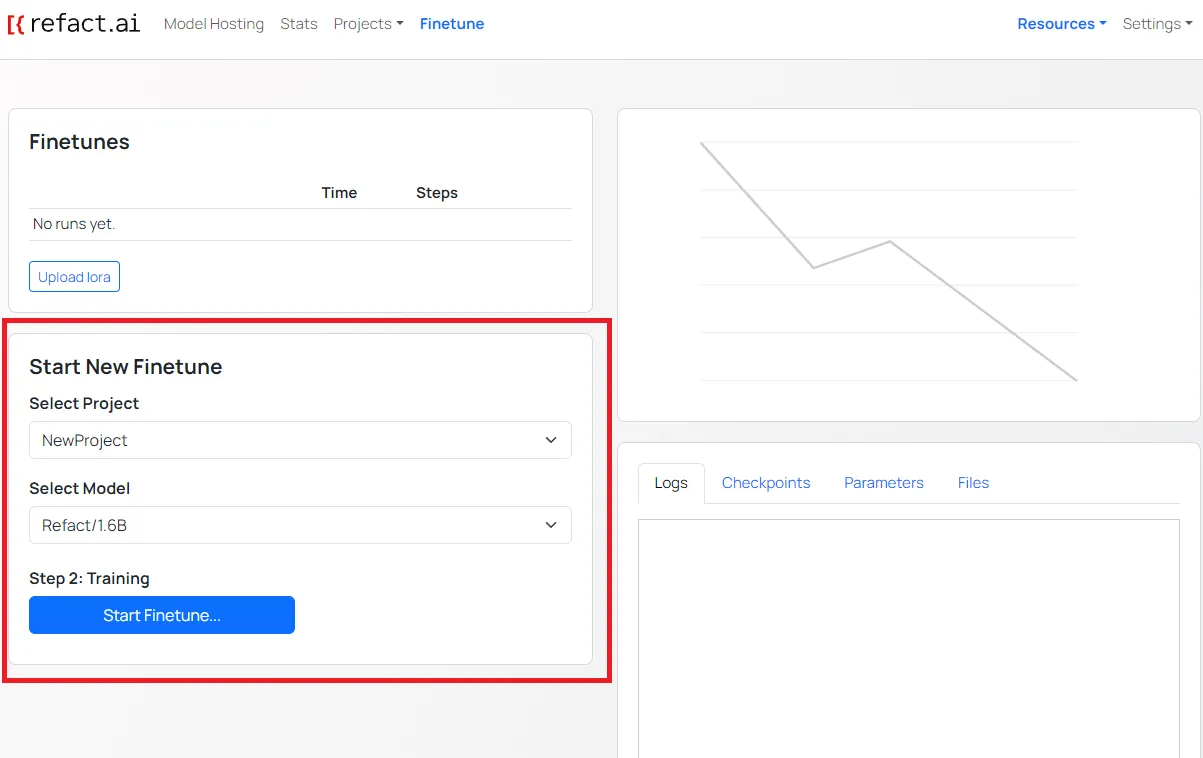
- On the fine-tuning page, click
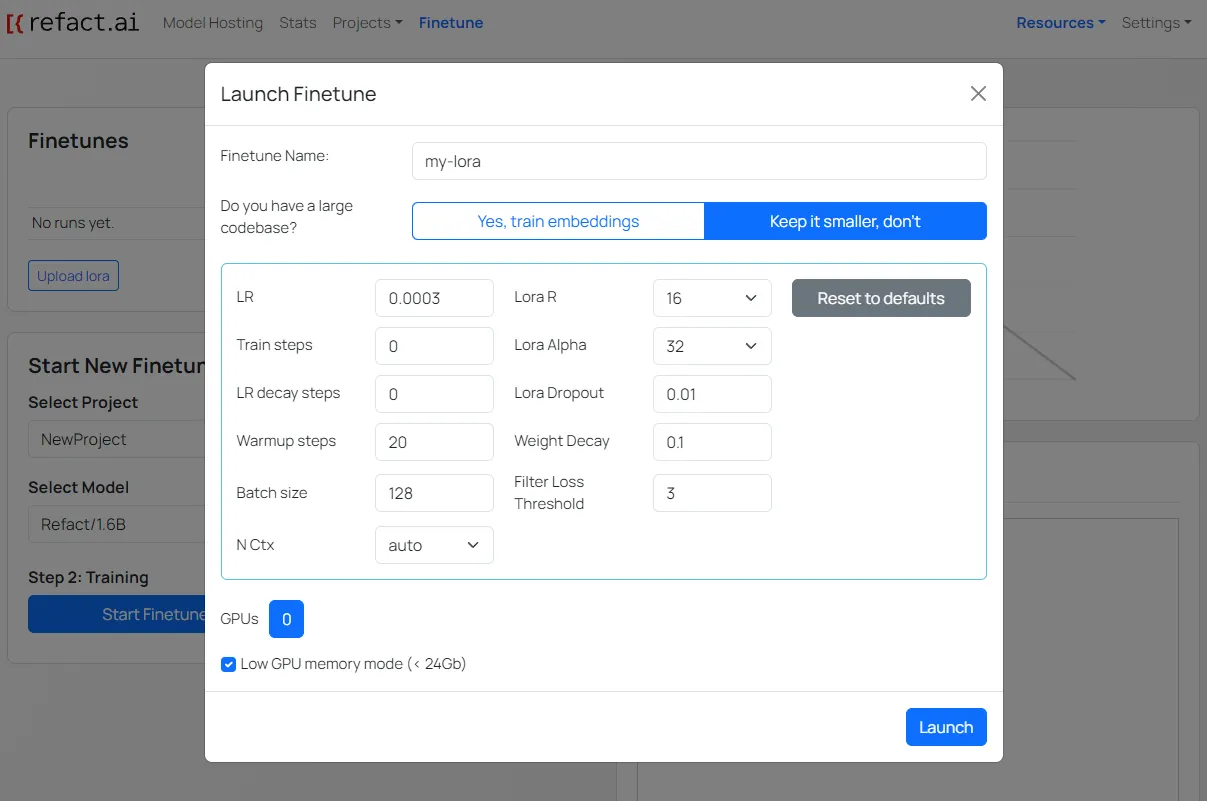
Start Fine-tuning. - In the pop-up, name your fine-tuning session and select:
- Train embeddings for large code bases.
- Keep it smaller for smaller code bases.
- GPUs - select the number of the GPU to use for fine-tuning (number of the GPU starting from 0). If you have multiple GPUs, you can select more than one GPU.
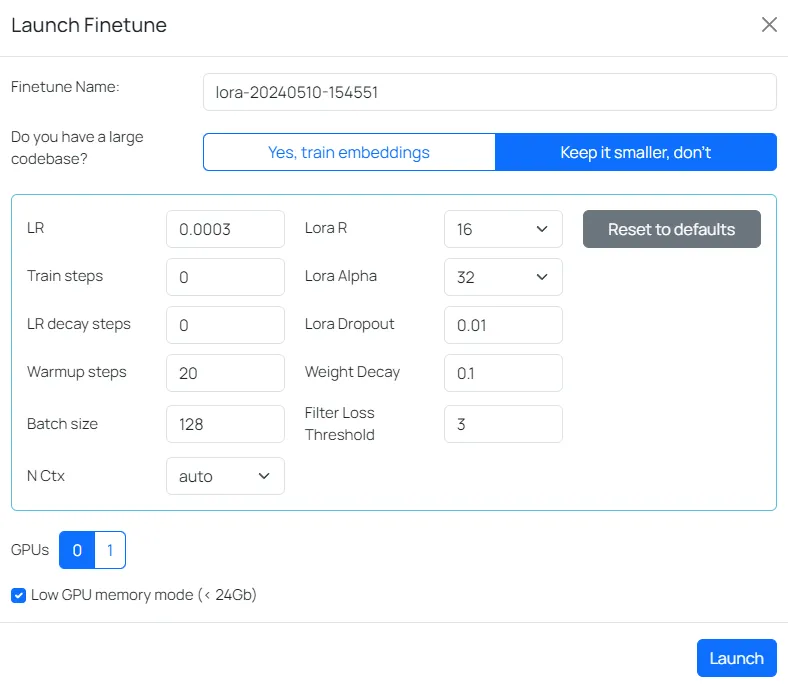
- Alternatively, manually adjust fine-tuning settings like model capacity or training schedule.
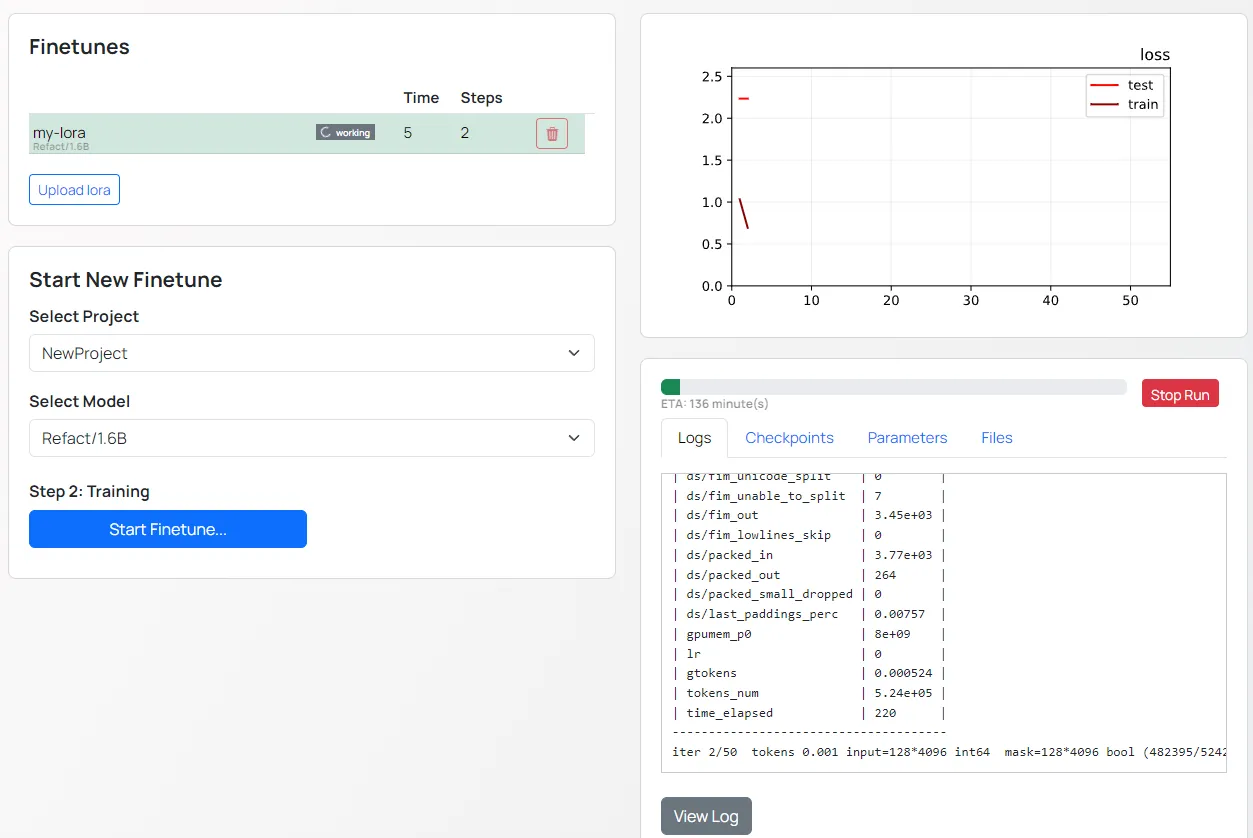
Monitor Fine-Tuning
Once the fine-tuning is started, you can monitor the progress in the Finetune page.
On the right side, the following information is displayed:
- Chart - shows the results of the fine-tuning
- ETA bar - shows the estimated time remaining
- Information - provides the following information:
- Logs - shows the logs of the fine-tuning
- Checkpoints - lists the checkpoints created during the fine-tuning
- Parameters - provides information about the parameters used during the fine-tuning
- Files - provides information about the files used during the fine-tuning
Select the Base Model
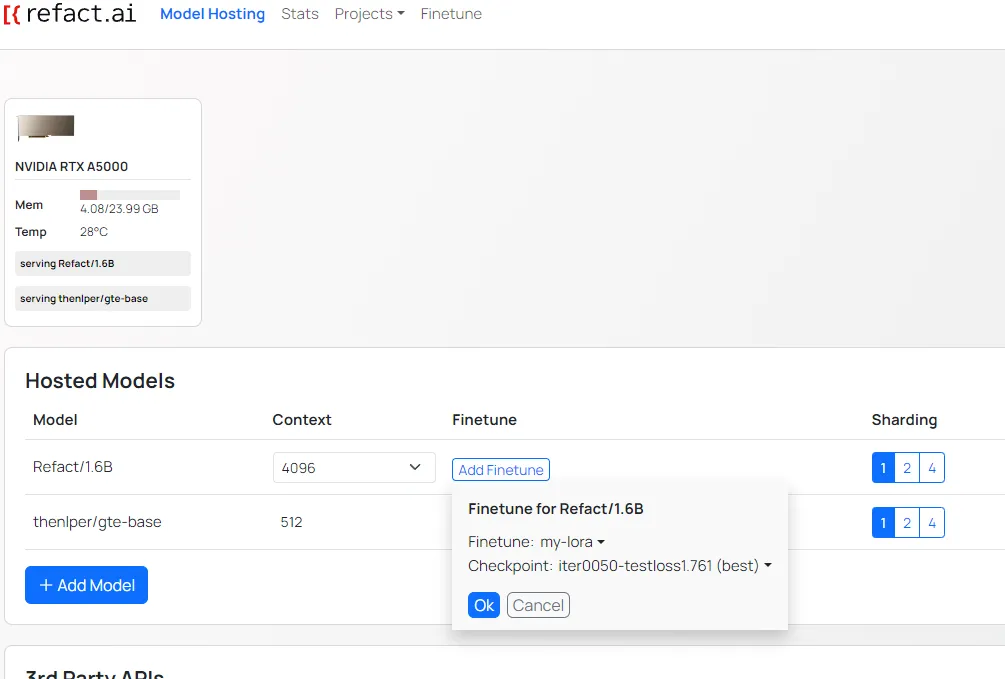
Once the fine-tuning is completed, navigate to the Model Hosting page and click Add Model to choose the base model.
After selecting the model, select the newly created lora (the result of fine-tuning, which will act as a patch to the base model) in the Finetune row.
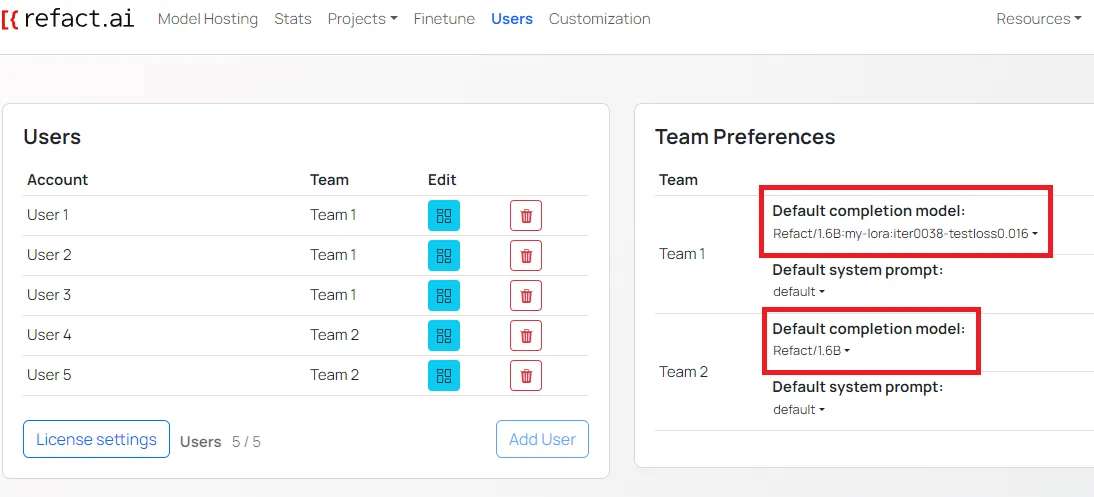
Enabling Fine-Tuning for Teams
With Refact.ai Enterprise, you can enable different fine-tuning options for different teams.
Navigate to the Users page. You will see a list of all users and Team Preferences section.
You can specify the completion model. When having multiple projects and fine-tuned models, you can specify the completion model for each project.